What you can do is, check the PSUs side labels. However, you need to remove the side panel and locate the PSU before you can read its label. This article provides you with a step-by-step guide to accessing the PSU and checking its wattage. So without further delay, let us get right into it.
How to check PSU wattage?
Here are two simple ways you can check your PSU wattage.
Check the PSU Side Label
You can usually find the PSU on the bottom and the back side of the case compartment. The label, however, can be located on either side of the PSU. So you may need to open the PC case to access it. If you have a CPU case with transparent side panels, you may be able to check the PSU wattage from the outside. But, if you have an opaque side panel or cannot read the labels due to tinted side panels, you need to remove it to access the PSU. Some PSUs even have an LED panel that shows the current power the PC uses, along with the PSU wattage. If you have this kind of PSU with a transparent side panel, check the readings on this LED panel to know your PSU wattage. If you cannot access the PSU easily, follow the methods mentioned below to access and check the PSU wattage. Before starting, make sure that you have removed the PC from a wall outlet. Also, press and hold the power button for five to ten seconds to remove any built-up charge from the capacitors.
Open the Side Panel
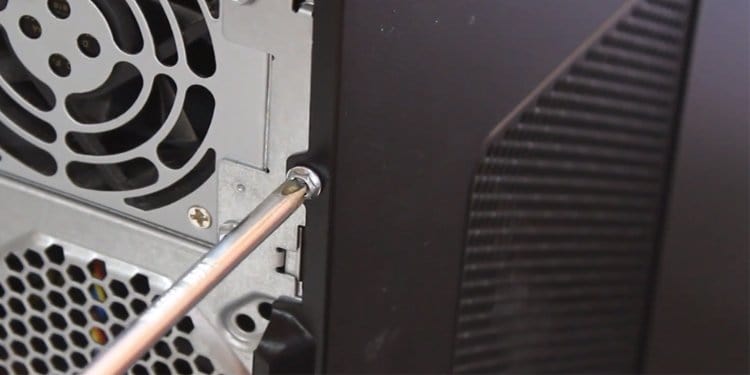
To remove the side panel, unscrew any screws on the back or the side of the CPU case that is holding the panel in place. We recommend you use a metallic tray to prevent the screws from being misplaced. There should be three to five screws that hold the panel. Once you remove all the screws, gently take the panel out by sliding it outwards or taking it out at an angle. Repeat the same process on the opposite side. You can access the entire motherboard once you remove one panel, and the other panel exposes a compartment that stores all the cables.
Search for the PSU
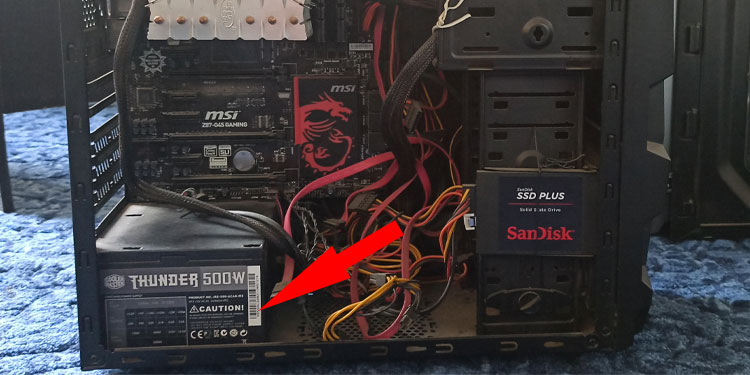
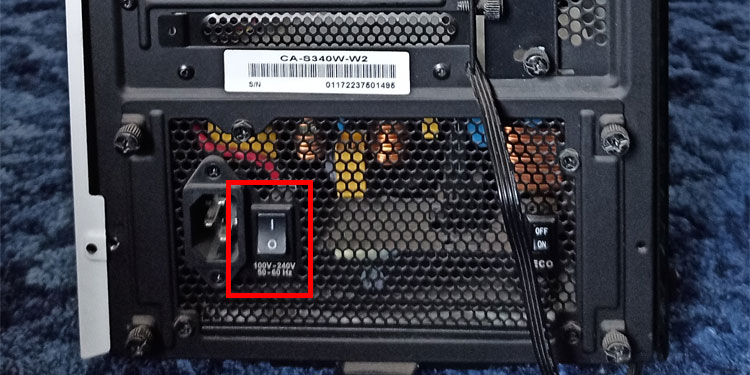
The power supply is usually located on the back-top or back-bottom side of the PC case. Search for a rectangular cuboid on the back side of the case compartment. The PSU will be pretty big and, therefore, will be hard to miss. Another way you can check where the PSU lies is from the rear side of the PC case. The PSU comes with a switch on the rear of the case. Search the case’s rear for this switch to locate the PSU. Once you have located the PSU, check for labels written on it. Look for writings on either side. If you cannot find anything written, you might remove it from the PC case.
Remove All PSU Cables
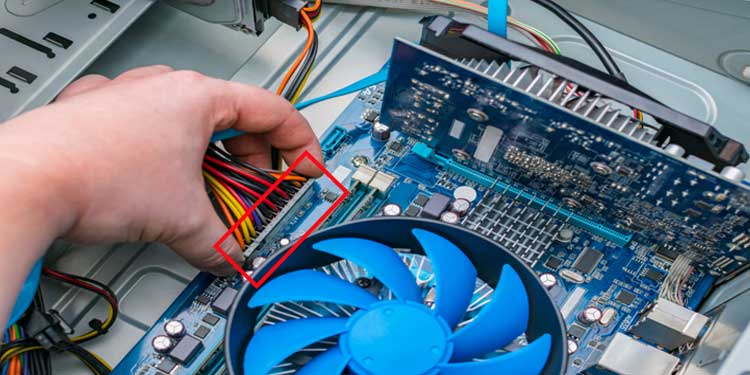
If you don’t have access to the PSU label, you need to remove it from the PC. To remove the PSU, you need to detach all the cable that connects it to the motherboard, SSD/HDDs, disk drives, and GPUs. Also, remove the cable that connects the wall outlet to the PSU. The PSU should now be accessible once you pull all the connected wires. Once you remove all the cables, remove any screws that holds the PSU in place. Now, slide the PSU outwards to access the PSU label.
Check the PSU label
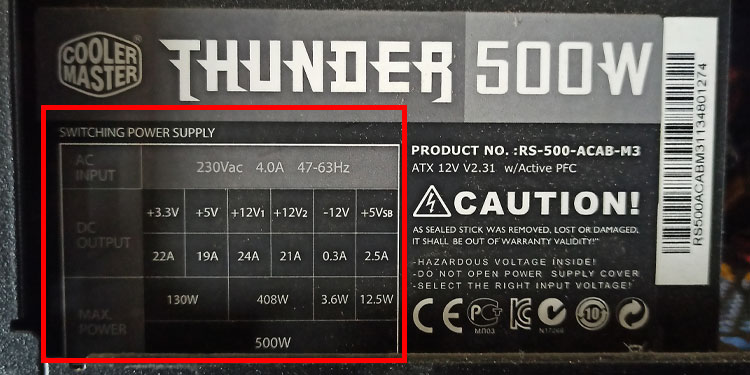
Your PSU wattage will be written in bold numbers, with the letter W written after the number. For example, 550W, 650W, etc,. You can also find details on the label, such as the name and the model number, voltage, maximum power, maximum current, and total power. A certified PSU will have a certified rating like 80 Plus gold, bronze, silver, or platinum.
Check the User Manual
If you are using a pre-built system and you do not want any hassle of taking the PC apart to read the PC label, you can refer to its user manual. The PC’s user manual will have all the details about its components. Once you know the PSU model name, you can refer to the internet to check for its details.
Understanding PSU Label
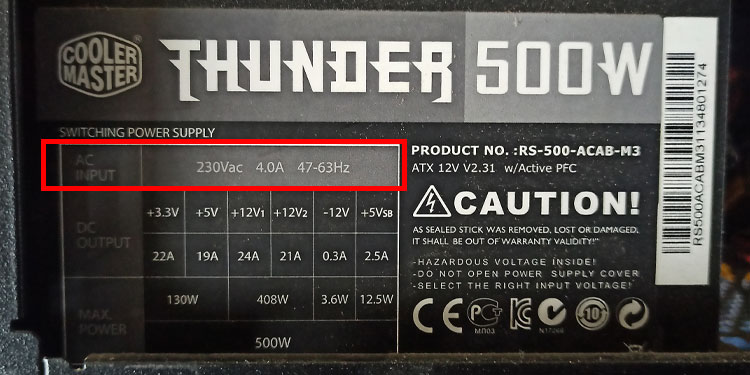
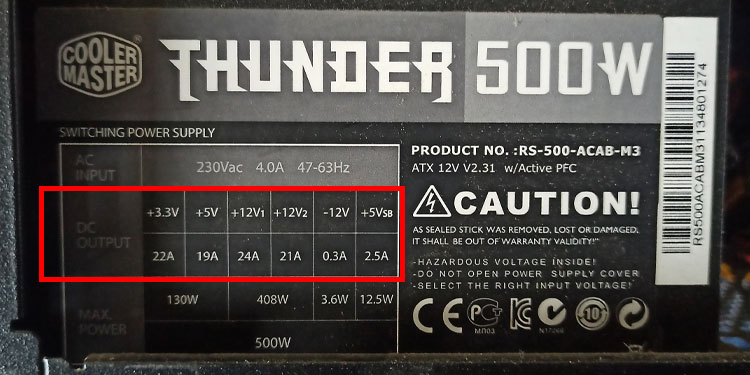
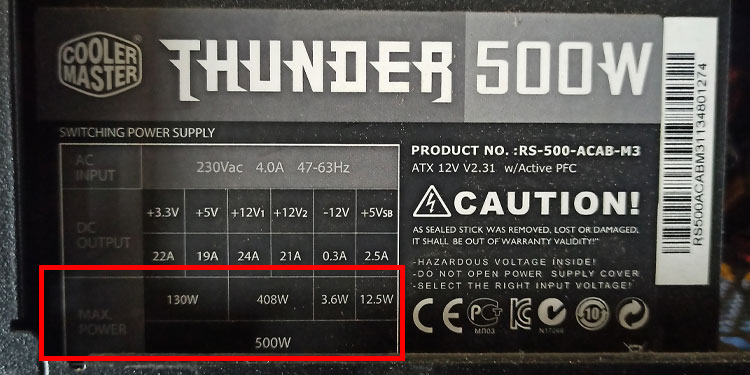
Now that you have found the label on the PSU, you can use this to determine the PSU AC input, DC output, maximum load, and Maximum Combined Wattage. AC input or the Alternating Current input the amount of power the PSU can convert into Direct Current. This can be represented on the label as 120-220V + 10A-5A + 50Hz-60Hz. This means that the PSU’s AC should be in the mentioned range. The DC output represents the range of voltage that gets sent to the motherboard and all connected hardware. Finally, under Maximum Combined Wattage, you can see the Total Power. This is your PSU wattage. You can also look for the number written in huge bold writing if you just want to check the PSU wattage.
Related Questions
How many watts does my computer need?
Depending on the hardware components you use in your build, several factors contribute to the number of watts a PC uses. If you use a high-end graphics card, it may require a PSU with high wattage. Newegg’s website has a section that calculates the total wattage your computer needs depending on the components you use. Open the site and select the CPU, motherboard GPU, RAM, SSD/HDD. The site will give you an approximate value. Using this, you can determine the amount of power your PC needs.