TPM 1.2 has been around for a long time (released in 2011). However, the newer TPM, TPM 2.0, is said to be more secure than its predecessor. This is because TPM 2.0 utilizes the asymmetric digital signature feature, adding an extra layer of security to your system. Hence, Microsoft has made it mandatory for each user to install TPM 2.0 on their system before updating to Windows 11. So, this guide mainly focuses on understanding and enabling TPM on a gigabyte gaming motherboard. The definitive process for other motherboard manufacturers is similar to this one, the only difference being the BIOS layout. So, if you’re looking to enable TPM 2.0 on your system, this is the right place for you. Let’s dive straight into it!
How to Check if TPM Is Enabled or Not?
TPM is used to secure confidential data in your system, that is, your authentication measurements and certificates. As previously mentioned, TPM 2.0 is a mandatory system requirement for Windows 11 installation. So, if you’d like to verify whether TPM 2.0 is installed or not on your Windows 10, the steps below show how to. However, if you’re already using the Windows 11 OS and want to verify it for yourself, the steps are the same as below.
Enabling TPM on a Gigabyte Motherboard
Windows OS is probably the most widely used OS globally; hence, it’s a common target for spammers and hackers. This is where TPM comes to play, as it prevents firmware attacks from different viruses and malware. It protects sensitive data such as encryption keys and passwords. TPM 2.0 is also said to be a standard for encryption process in Windows OS, and it can be enabled via the BIOS. Listed below are the steps to enable TPM on a gigabyte motherboard with an AMD as well as an Intel processor.
For AMD Processor
For Intel Processor
Related Queries
What Is Secure Boot?
Secure Boot secures your computer during the bootup process. This security feature is provided by UEFI (Unified Extensible Firmware Interface) and prevents attacks from malware and ransomware during startup. Secure Boot allows your computer to startup only by using software from OEM (Original Software Manufacturer). Hence, its unique security strategy detects and protects your computer from being hijacked and infected by malware and viruses. Similar to TPM 2.0, Microsoft has also listed secure boot as a mandatory system requirement before installing Windows 11.
How to Check if Secure Boot Is Enabled or Not?
Secure boot prevents attacks on key OS files and the boot loaders of your system. Hence, if you’d like to check if secure boot is enabled on your system or not, the exact steps to do so are listed just below. This method applies to both Windows 10 and 11.
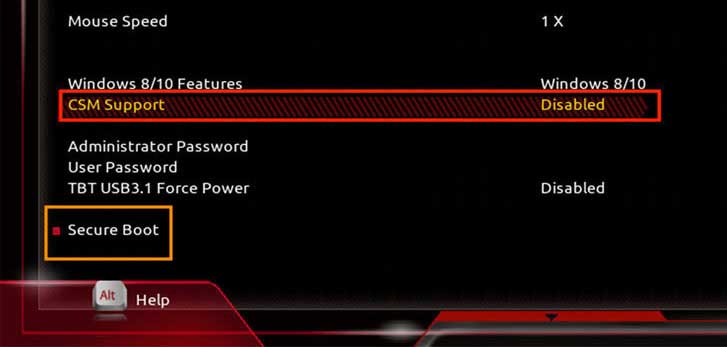
Enable Secure Boot on a Gigabyte Motherboard
If secure boot is not enabled on your system yet, it’s advisable to do so, especially before upgrading to Windows 11. You can manually enable Secure boot through the BIOS settings. The steps below are shown in regards to a gigabyte motherboard; however, a similar process applies to other motherboard manufacturers as well. Unlike the BIOS layout, the core concept for enabling secure boot remains the same for every system.
For AMD Processor
For Intel Processor